Powershell lanaguage String Formatting
Formatting output
When we execute a cmdlet we are relying on PowerShell to display results.
The "Format-" cmdlets allow us to choose which format to display results
in. To get a list of formatting options, type the following command:
Get-Command Format-*<enter>
Format-Custom
Format-List
Format-Table
Format-Wide
Format-Table
"Format-Table" cmdlet displays data in rows and columns, similar to what
you would see in an Excel spreadsheet. By default, PowerShell attempts to
format the view, but doesn't always display the best results. For example
let's format the output of the "Get-ChildItem" cmdlet for the "C:\Windows"
directory.
Get-ChildItem C:\Windows | Format-Table<enter>
I like the table format, but there seems to be too much white space
(spaces) between the columns for my taste. Fortunately, there is a
parameter -AutoSize to assist us with white space issues.
Get-ChildItem C:\Windows | Format-Table -AutoSize<enter>
O.k. maybe that wasn't what you were looking for either. As shown from a
previous example, use the <tab> key to cycle through the available
parameters for the "Format-table" cmdlet. Expierment with each available
parameters to see how format is manipulated.
Format-List
"Format-List" cmdlet displays data in... of course, a list. For example:
Get-ChildItem C:\Windows | Format-List<enter>
By default, we get the following properties: Name, CreationTime,
LastWriteTime, and LastAccessTime. The boss looks at the list and requests
the full path to the files. Use the -Property parameter to
list the "FullName" property.
Reminder: use "Get-Member" cmdlet to list the available properties:
Get-ChildItem C:\Windows | Format-List -Property FullName<enter>
If your boss is like mine, I usually hear something like... "that's great,
but now I want the full path to all files and subdirectories, creation
date, and last time a file was modified." Your answer... "No Problem!" To
enumerate multiple properties, just separate each property with a comma (,)
as shown in this example:
Get-ChildItem C:\Windows -Recurse | Format-List -Property
FullName,CreationTime,LastWriteTime<enter>
Note:
You can also use the
-Property
parameter with the "Format-Table" cmdlet to build tables, with each
property as a header.
Format-Wide
"Format-Wide" cmdlet compresses results of a list, to fit the screen:
Get-ChildItem C: | Format-Wide<enter>
The results are in list format sorted by column, similar to the old "dir
/D" command. You can customize the number of columns using the -Column number parameter:
Get-ChildItem C: | Format-Wide -Column 3<enter>
Group-Object
The "Group-Object" cmdlet allows us to format output information based on
groups. For example, there is a property call "Company" for the object
returned by the "Get-Process" cmdlet. Let's assign the "Company" property
to a group:
Get-Process | Group-Object Company<enter>
The output groups the information as follows:
· Name - Name provided by the Company property of the Get-Process object.
-
Count - The number of process running from each Company.
-
Group - A truncated list of the processes running.
Here is another example of how to use the "Group-Object" cmdlet. You want
to discover which Event IDs are present in the system log:
Get-EventLog System | Group-Object eventid<enter>
Note: The Name column is the Event ID, even though it's not labeled as
such. By default, "Group-Object" places the property you specify in the
"Name" column.
Sort-Object
From the example above we are presented with a "Count" column. This
indicates the number of occurrences per each Event ID. Just as it sounds,
the "Sort-Object" cmdlet provides a mechanism to sort results. In this
example, I'm going to further build on the command above to sort from most
occurrences to least:
Get-EventLog System | Group-Object eventid | Sort-Object Count
-descending<enter>
The results are now sorted from most to least number of occurrences. Couple
of things to notice here:
· I sorted on the "Count" column. You could also sort by "Name" or any
column you choose.
· As shown above you can pipe results from one cmdlet to another and then
another, etc...
Convertto-HTML
I love this cmdlet. It's not the best html conversion, sometimes the output
looks great, sometimes not. It's just fast and I don't have to write any
code to convert results, like I did in VBScript. Let's send the results of
"Get-Process" to html.
Get-Process | ConvertTo-html<enter>
Well, the cmdlet preformed the conversion but I want the result saved to an
html file. I'm going to use the "Out-File" cmdlet to redirect the results
into a file. This is similar to using the redirect symbol ">" in the old
dos command shell.
Get-Process | ConvertTo-html | out-file "Processes.html"<enter>
To open the .html file use the "Invoke-Item" cmdlet. This is equivalent to
clicking on a file where the file type determines which application is
launched.
Invoke-Item Processes.html<enter>
The default browser is launched presenting the results saved in the html
file. Like I said, doesn't always look great... But it is fast and the html
code can be edited (to look pretty) if desired.
Export-CSV
This is another formatting cmdlet that you are going to love. It takes
results and converts it to a csv file. In the following examples we are
going to Export the processes and open the file in a spreadsheet. You must
have Excel or some other type of spreadsheet installed on the system.
1. Export results to a .csv file"
Get-Process | Export-CSV Processes.csv<enter>
2. Open the spreadsheet:
Invoke-Item Processes.csv<enter>
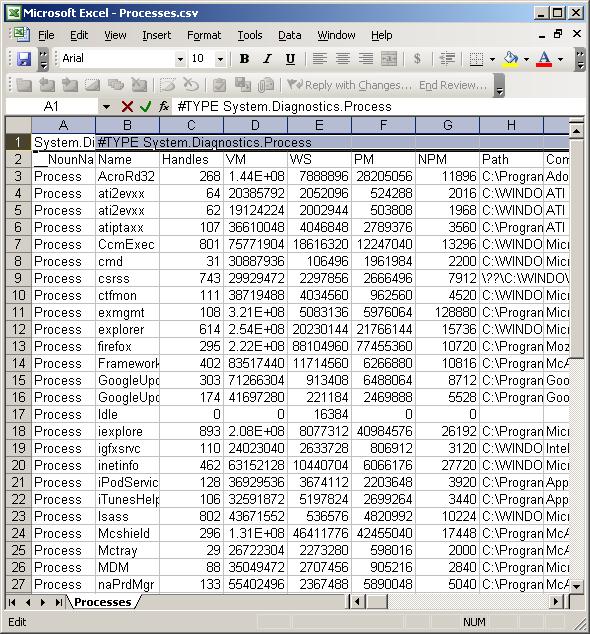
Process CSV
Image 4.2
As shown, you can use the "Export-CSV" cmdlet to quickly document and/or
create reports. Much more simple that what was required to create the same
report in VBScript.
Alright, we got through PowerShell Parameters, Objects, and Formatting. We
just hit the tip of the iceberg, we will continue utilizing these cmdlet
options as we work in later PowerShell tutorials. Obviously, there are more
cmdlet options and parameters we have not covered. PowerShell provides the
tools (Get-Help and Get-Member) to explore and learn, so snoop around and
get your feet wet.
Hope I was able to shed some light on the advantage objects provide over
traditional shell "text string" output. As Objects are the heart of
PowerShell and PowerShell scripting, we will be working in depth with
objects as we continue our PowerShell training. If you have any comments or
questions please use the comment section bellow.